This article focuses on managing software RAID level 1 (RAID1) in Linux, but similar approach could be used to other RAID levels.
Software RAID in Linux we use can be managed with mdadm tool.
Devices used by RAID are /dev/mdX, X being the number of a RAID device, for example /dev/md0 or /dev/md1.
To list all devices in the system, including RAID devices, use fdisk:
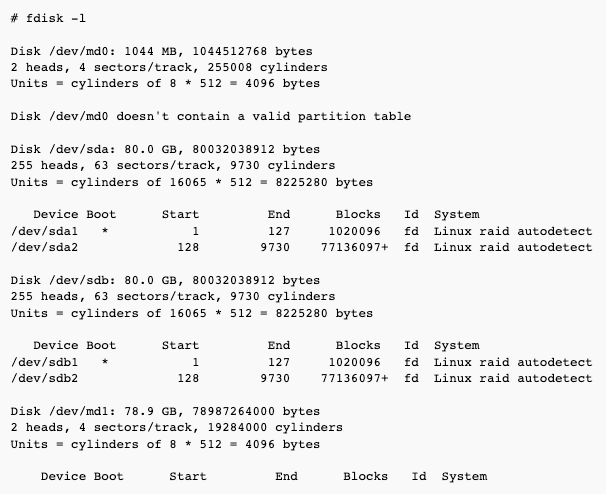
Warnings about the lack of a "valid partition table" are normal with swap on md devices.
Using mdadm tool
Viewing RAID devices
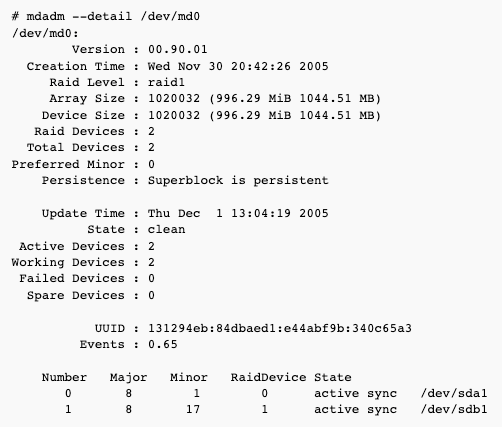
This one shows details for the device /dev/md0 - it has two RAID/active/working devices, both are active and are in sync:
Simulating hardware failure
This one shows details for the device /dev/md1 - it has two RAID devices, and only one of them is active and working. One RAID device is marked as removed - this was caused by a simulated hardware failure:
- booting with only the first disk to see if RAID is configured properly,
- booting with only the second disk to see if RAID is configured properly,
- booting the server again with both disks.
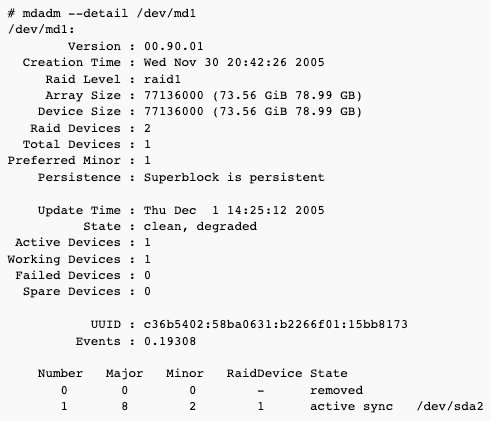
One RAID device is marked as "removed", because it is not in sync (is "older") with the other ("newer") device.
Recovering from a simulated hardware failure
This part is easy: just mark the device as faulty, remove it from the array, and then add it again - it will start to reconstruct.
Setting the device as faulty:

Remove the device from the arrry:

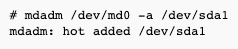
Add the device to the array:

Check what the device is doing:
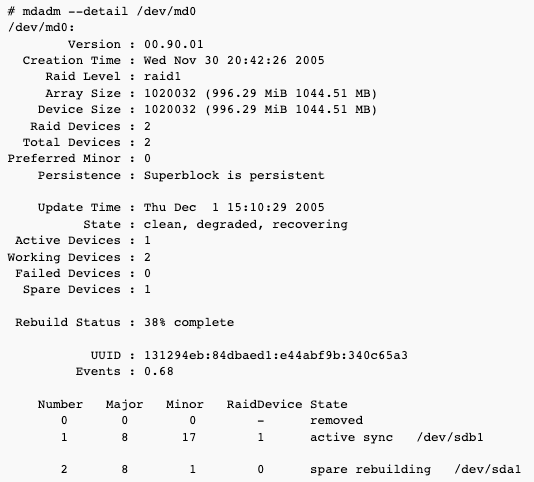
As we can see, it's being rebuilt - after that process is finished, both devices (dev/sda1 and /dev/sdb1) will be marked as "active sync".
You can see in /proc/mdstat how long this process will take and at what speed the reconstruction is progressing:

Recovering from a real hardware failure
This process is similar to recovering from a "simulated failure":
To recover from a from a real hardware failure, do:
- make sure that partitions on a new device are the same as on the old one:
- create them with
fdisk(fdisk -lwill tell you what partitions you have on a good disk; remember to set the same start/end blocks, and to set partition's system id to "Linux raid autodetect") - consult /etc/mdadm.conf file, which describes which partitions are used for md devices
- add a new device to the array:
Then, you can consult mdadm --detail /dev/md0 and/or /proc/mdstat to see how long the reconstruction will take.
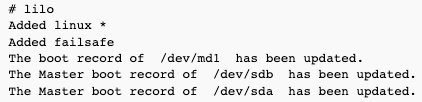
Make sure you run lilo when the reconstruction is complete - see below.
RAID boot CD-ROM
It's always a good idea to have a CD-ROM, from which you can always boot your system (in case lilo was removed etc.).
It can be created with mkbootdisk tool:

Then, just burn the created ISO.
If everything fails
If everything fails - the system doesn't boot from any of the disks nor from the CD-ROM, you have to know that you can easily "see" files on RAID devices (at least on RAID1 devices) - just insert any Live Linux distribution, and boot the system - you should see the files on normal /dev/sdX partitions - you can copy the files to the remote system for example with scp.
You can manually assemble a RAID device using commands below:

Installing lilo
You have to install lilo on all devices if you replaced the disks:
If lilo gives you a following error:

This may mean two things:
- RAID is being rebuilt - check it with
cat /proc/mdstat, and try again when it's finished. - Another is that the first device in the RAID array doesn't exist, such as when building a degraded array with only one device. If you stop the array and reassemble it so that the active device is first, lilo should start working again.
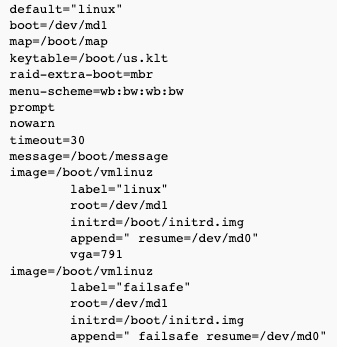
Example lilo.conf for RAID